Parent 

IBM 5160 - Faulty RAM in bank 0


NOTE:  

This procedure was written for the IBM 5160 (IBM XT) motherboard.
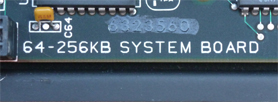
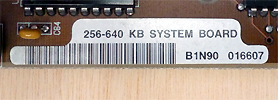


You are here because you believe that there may be a faulty RAM chip/s in bank 0.

Click here to see a diagram that shows the four RAM banks.

Vintage RAM chips have a relatively high failure rate.  The failure of any chip in the 5160's first bank of RAM (bank 0) results in what appears to be a 'dead' motherboard.  (Of course, the 'dead' motherboard symptom has many possible causes.)

Technical:

This is because the power-on self test (POST) within the IBM BIOS ROM tests early RAM, and if found faulty, the POST will go into a loop (Checkpoint code 4), and to you, the user, the motherboard will appear to be 'dead'. (No video, no beeps, nothing.)
• 1982 dated motherboard IBM BIOS ROM':  'Early' RAM is the first 16 KB.
• 1986 dated motherboard IBM BIOS ROM':  'Early' RAM is the first 64 KB.


Step 1 of 5  -  Examination of RAM chips in bank 0

If you acquired the IBM 5160 motherboard in a faulty state, then you need to cater for the possibility that a previous owner may have done a bad repair to bank 0:

1. Verify that all RAM chips in bank 0 are plugged in the correct orientation; and
2. Verify that all RAM chips in bank 0 are compatible with the IBM 5160 motherboard.  See here.

IMPORTANT:   • All banks on the 64-256KB type of 5160 motherboard use the same type of RAM chip (generic type 4164).
• The 256-640KB type of 5160 motherboard is different.  The chips in banks 0 and 1 are a different type (generic type 41256) to the type used in banks 2 and 3 (generic type 4164).


Step 2 of 5  -  Examination and re-seat of RAM chips in bank 0

Note that rather than a RAM chip actually failing, what might have instead happened is that a pin on the RAM chip has developed nil/poor electrical contact with the contact in the chip's socket.

For each chip in bank 0, perform the following:

1. Completely remove the chip; then;
2. Verify that all pins are as expected (clean, complete, not bent up under the chip); then
3. Being very careful, put the chip back into its socket.

Regarding point 3 above, obviously it is critical that you do not cause a problem, e.g. you do not bend a pin up under the chip, e.g. correct orientation.

If this step failed to get the motherboard displaying anything on-screen (including only a cursor), then try the next step.


Step 3 of 5  -  Isolation

There is a slight possibility that a RAM chip in a bank other than 0 has failed in such a way as to cause a problem reading/writing to bank 0.

So, remove the RAM chips from the banks other than bank 0, leaving only bank 0 populated.

If this step failed to get the motherboard displaying anything on-screen (including only a cursor), then try the next step.


Step 4 of 5  -  Substitution

Replace all of the nine RAM chips in bank 0 with a set of nine known-good RAM chips.
If you do not use known-good RAM chips, then all you could be doing is swapping BAD with BAD.
If you do not have known-good RAM chips, then the best you can do at this time is to use the chips that were removed in step 3, paying strict attention to to the following important information.

IMPORTANT:   • All banks on the 64-256KB type of 5160 motherboard use the same type of RAM chip (generic type 4164).
• The 256-640KB type of 5160 motherboard is different.  The chips in banks 0 and 1 are a different type (generic type 41256) to the type used in banks 2 and 3 (generic type 4164).


If this step failed to get the motherboard displaying anything on-screen (including only a cursor), then try the next step.


Step 5 of 5  -  Is there really a bank 0 problem ?

If you didn't start this procedure knowing for fact that you have a bank 0 problem, then now is a good time to see if indeed the problem is bank 0.

If you have a logic probe, then refer to the 'Checkpoint code 4' section of here.  If you see activity on port A of the 8255 as described at that web page, then there is probably a bank 0 problem, and per that page, work out which bit in bank 0 is indicated as faulty.

You could use Ruud's diagnostic ROM to see it reports the first 64 KB of RAM as good.
For that, you will need either an MDA or CGA video card.
The use of Ruud's diagnostic ROM on a 64-256KB motherboard is described at here.
The use of Ruud's diagnostic ROM on a 256KB-640KB motherboard is described at here.

Alternatively, you could try a suitable Supersoft/Landmark diagnostic ROM, noting that it too, has particular video card requirements.  However, in regard to RAM related errors, it can sometimes be misleading.